New Arrivals
So I’m sure you’re wondering what’s up with all the crickets up in here. I’ve been dying to tell you guys the news but I’ve also been super busy working on the next chapter of My Sweetnest and umm… my life, which opened a pretty dramatic chapter 11 weeks ago. So without further ado, I’m thrilled to announce that my blog is moving to its very own domain – www.mysweetnestblog.com. ekkkk!
As you can see, I’ve also added an exciting new category to the random stuff I talk about it… Pregnancy. Yep… Jer and I are expecting a sweet little baby on July 4th that we’ve dubbed “Baby D”. Pretty clever, huh? We couldn’t be more excited about our little firecracker and wanted to use the blog to capture all the good/crazy/happy/scary/awww/ugly/sad/fat/cute/eww/what’s that!? moments of pregnancy.
Before you dip because you’re here to get craft ideas not to hear about sore boobs and vomiting, I promise you that my blog is not going to become another annoying prego blog or just an outlet to constantly share pictures of my kid. It will still have LOTS of DIY projects… but I can’t think of a better craft project than what I’ve currently got cooking. OK, I also promise not to say annoying crap like that ever again… on the forreals.
So head over to www.mysweetnestblog.com and check out the new posts, new features and tell me what you think!
Ten Holiday Gift Ideas
So I’ve been super busy working on the next chapter of My Sweetnest. Lots of exciting news and changes coming in December and I can’t wait to share it with you. But holy smokes guys – it’s almost mid-November. How is this possible? I’ve only bought two Christmas gifts so far and haven’t even decided what I’m getting everyone yet. I hate waiting until the last minute for several reasons, but mostly because I don’t get the opportunity to put thought into it – and I LOVE giving gifts. I know a lot of people say it, but I honestly get more joy out of giving gifts than receiving.
But with the weeks quickly slipping by, I forced myself to sit down and compile some gift ideas. Don’t worry, I’m not giving away any surprises here… or am I?
Move over Oprah, here are a few of my favorite gift ideas… with most under $30 bucks!
Monogrammed Collapsible Market Tote ($30 at Boutique Me): This is a great gift idea for any lady in your life. Perfect for carrying casserole dishes or for running into the grocery store for a few things.

Layered Turquoise Necklace ($29.99 at Shop Design Spark): Perfect for any fashionista in your life and for $30 bucks… a steal! Shout out to my sister for finding this awesome retailer through Pinterest. They have lots of bold jewelry at a great price… kind of a Stella & Dot look on a target budget. And who doesn’t love that?
Stella & Dot Initial Charms ($29+ at Stella & Dot): Speaking of Stella & Dot and my sister, this was my gift to my sister last year. I got her a “K” and blue gem charm for my niece’s initial and birthstone. Makes a great gift for any new mamas you know!
Luxury Plush Foot Duvets ($19 at Restoration Hardware): By far the most comfortable slippers I’ve ever put on my feet. I mean “foot duvet” really? How can that not be heaven! They come in a variety of colors – I have the red ones and slip these suckers on everyday when I get home. In fact, I have them on right now!
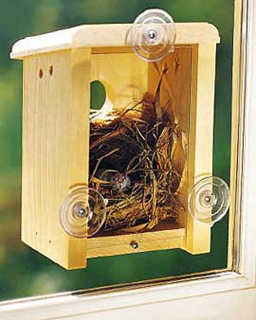
Window Nest Box ($24.95 at Gardener’s): Ok, Ok, this one is a little quirky, but come on.. who doesn’t have quirky people in their life? I know several people that would dig this!
L’Occitane en Provence Shea Butter Hand Cream & Lip Balm ($19 at L’Occitane): I was introduced to this brand during their recent Facebook campaign and got a free tube of hand cream that I LOVE! It’s clean smelling and light yet does an excellent job at moisturizing my hands.
Mary Kay TimeWise Miracle Set ($90 at Mary Kay): So I can’t talk about beauty products without talking about Mary Kay. My skin has done a 180 since using this miracle set and I’m never ever going back to another system. You know when you look in the mirror after consistently drinking a lot of water and think “man, my skin looks good”. Well this set does it for you. Jer surprised me last year with a twelve days of Christmas wreath – where 12 MK products (including some from this set) were individually wrapped on a wreath. It was so fun unwrapping one each day!

u-Control Toy Helicopter ($29.95 at Brookstone): Want to watch your husband turn into a 10 year old in the blink of an eye? This will do it. Jer LOVED this last year. This remote control helicopter is also pretty powerful, well.. unless you fly it to the top of the trees where it loses signal and then comes crashing down and you’ve broken your husband’s Christmas gift. It’s a really bad feeling – take it from me.
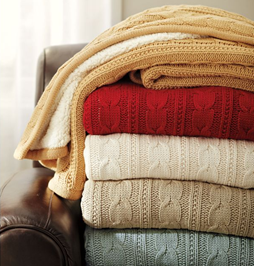
Cable Knit Throw ($99 at Pottery Barn): Although pretty pricey, who wouldn’t love this cozy cable knit throw. I especially like this one because you have the soft feeling of your favorite sweater on one side and plush faux sheepskin on the other. Holla-atcha-girl!
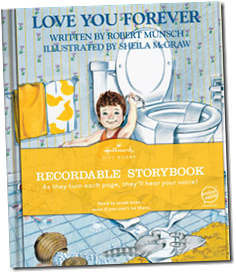
Recordable Storybooks ($29.95 at Hallmark): I love this as a gift for grandparents, great grandparents on even expecting parents. My personal favorite is “Love You Forever’”… image how special it will be for your children to hear once they are all grown up!
Well that does it folks… hope you enjoyed a few of my favorite holiday gift ideas! I’d love to hear your gift ideas, so please drop a few in the comments.
Happy shopping! ![]()
Bonus Room Reno – Weeks 2 & 3
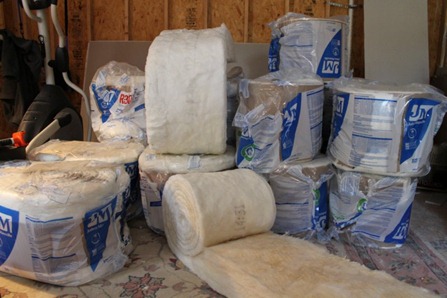
So weeks 2 & 3 and likely 4 (remember we’re weekend warriors!) is all about insulation. Aside from spackle, it’s the worst part of the job but it has to be done, because this room is burrrrrrr cold. It’s also pretty painful to be around – even when wearing the right protective gear. I mean doesn’t this picture alone, just make you itch?
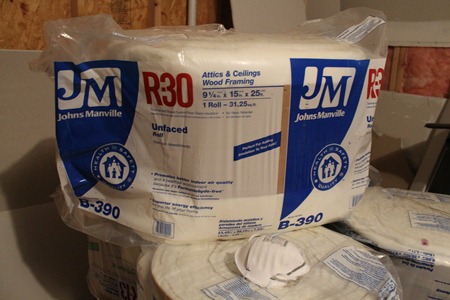
We started with the ceiling insulation and used 10 rolls of R-30. I’m using “we” loosely, as JD did most of the heavy lifting for this part. I was the helper or “apprentice” as I like to say, because I’m not crawling around on ceiling joists. aint-gonna-happen.
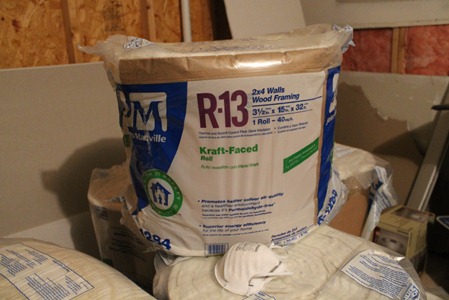
Then we moved on to the walls, which we’re still working on. We think it’s going to take about 13 rolls of R-13 to finish this sucker.
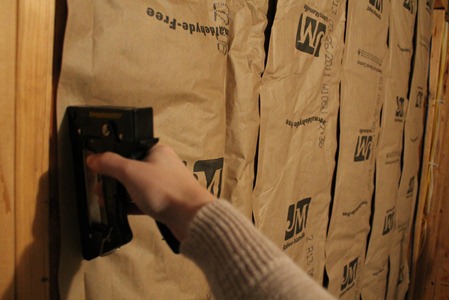
So I was actually really surprised how easy putting up the wall insulation was. We simply rolled it out, cut it to the height of the wall, and then stapled it in place…. Botta-bing, Botta-boom.
So I thought it would be helpful to start tracking our budget for this reno on here. I’m not a good receipt saver – but have luckily saved all 2 Lowes receipts for his project so far. Here’s where we’re at:
- 12, 2X4X96” Boards = $34.68
- 16 sheets of 1/2 inch drywall = $111.68
- 1 big box drywall screws = $21.97
- 13 bags of R-13 Faced Insulation = $116.35
- 10 bags of R-30 Insulation = $91.00
- Quality time spent in a dusty, cold room with my hottie of a hubby = Priceless! (haha, sorry… had to do it guys)
Total Spent to Date = $375.68
I promise there are much more exciting posts to come on the Bonus Room Reno! I know, I know… what’s more exciting than insulation? ![]()
Pinterest Frame Gallery
So I have to admit that I’m a Pinterest junkie. At least once a day I check out the “Home Decor” and of course the “DIY & Crafts” pins and occasionally wherever the cute baby animals pics live (am I a loser for starting an “Awww” board? ummm that would be a yes!) But as inspired as I am by the insanely unique and talented DIYers out there, I rarely pin stuff… I’m just much more of a re-pinner (is this a word yet?) So when I saw Sherry and Katie’s Pinterest Challenge post over at Young House Love and Bower Power this week, I immediately felt inspired (and challenged!) to start pinning the crap out of some stuff – including projects from yours truly. But since the Bonus Room Renovation sucked up my weekend (ask me how much I hate hanging insulation… I’m still itchy!) and the fact that I have to work on workdays, I was only able to squeeze in one project… but it happens to be something that I learned from Pinterest!
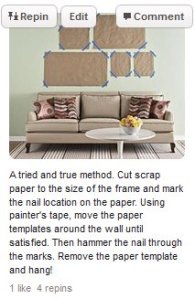 So for years, I’ve wanted to make a frame gallery. I know it’s one of those things that grows with time, but I just had no idea where or how to start it. That is my friends, until I saw this little pin on Pinterest with the caption “A tried and true method”. Perhaps this is something lots of peeps know, but not this gal. So when I saw the paper cutouts arranged on the wall with painters tape, a total light bulb went off. I had a similar reaction the first time someone told me the lyrics/title to one of my favorite Rolling Stones songs was actually “Beast of Burden”… for years I’ve been singing “I wanna be your big suburban…” Makes muuuuuuch more sense, right? 🙂
Another reason I put off hanging a frame gallery was due to the fact that I couldn’t find the “right” frames. So when I saw this 10 piece frame set at Target for $24 bucks, I was sold. I do wish it came with 11×14 frames, but the Dining Room didn’t mind loaning us theirs, especially since it has been rockin’ a hot new coat of grey paint.

So without further ado, here’s how I did it…
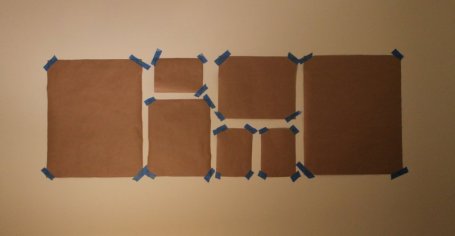
I started by arranging the frames on the floor. I must of made 30 different possible designs but landed on this one as I really like the balance of the two 11X14’s.

I then traced the frames on paper. I bought a roll of shipping paper from target for $3, which I totally plan to wrap Christmas presents with too. Just image the fun, funky bow colors you could add to it!!!
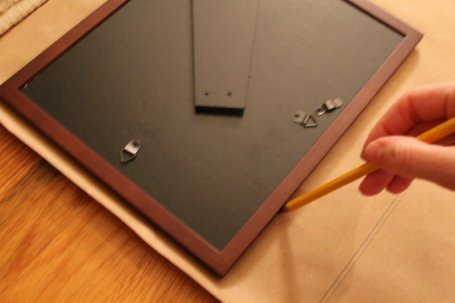
Since the wall perpendicular to my frame galley also has wall art, I measured its distance from the ceiling to get a good measurement for the height. I know you’re suppose to hang pictures eye level, but since JD and I are giants, this is our eye level.
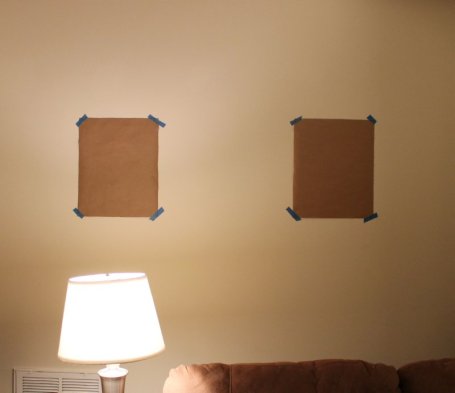
After hanging all of the cutouts up for the blueprint, I was ready to hammer in some nails! Once the nails were in, I then just removed the paper and hung the frames.
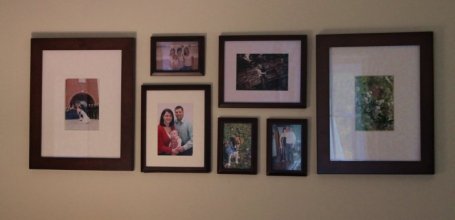
Looks itty bitty here, but it’s actually a pretty nice size! I think it adds a modern feel to our super traditional living room. We ❤ reclining sofas though, and not because they look good, but because they are soooooo comfy…so traditional it is 🙂

Bonus Room Reno – Week 1
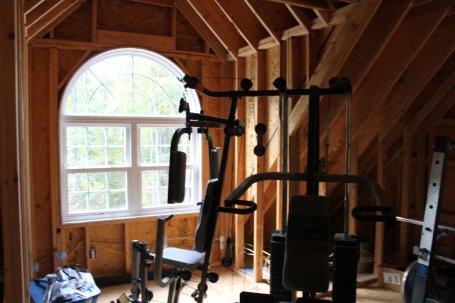
We’ve been putting it off for two years. We’ve talked about it, sketched it out and planned its purpose. But until last week, have never actually started any work on it. I’d like to introduce you to our “Bonus Room”. It’s main purpose in life is two-fold – 1. House all the crap we’re too lazy to walk up to the attic AND 2. Help our exercise equipment collect as much dust as possible. Seems like a pretty crappy use of a big room, right? Ummm… yeah.
Although neither of us have admitted it, I think this unfinished room had something to do with why JD and I fell in love with this house. See our first house in Christiansburg came with a completely unfinished basement that we (and several of our handy friends) finished on our own. It already had a bathroom and a small laundry closet, but we added – A tiled entry way and closet, a bedroom, a family/bonus/workout room and a huge walk-in storage closet. Needless to say, we walked away from that house with a little jingle in our pockets and boy did that feel good. I definitely don’t think we’ll make as much off this reno, but we will add an entire bedroom and be able to sell this bad boy as a 4 bedroom-er… holla!
So although this room has been our red-headed step child for many many months, we’re ready to make this sucker shine. And since JD seems to know how to do every repair job in the book, we’re doing the entire project ourselves! Ok… we’re debating contracting the mud work, but who wouldn’t right…? It flat out sucks.
Here’s our first guess at what we need for this reno:
- 12 2X4 boards to frame in the walk-in closet
- 12 pieces of 1/2″ dry wall for the ceiling
- ~16 pieces of 1/2″ dry wall for the walls
- TBD on amount of insulation (for the walls and ceiling)
- TBD on amount of trim
- 1 box of drywall screws
- 5 gallon bucket of joint compound (aka spackle) and drywall tape
- 1 closet door
Here’s our plan of attack:
Since the electrical work is already done, we’re jumping right in.
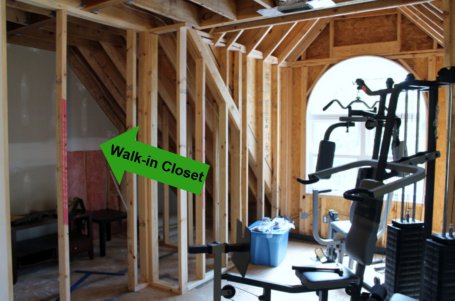
1. We started by framing the closet. Without a closet, the room will not officially be considered a bedroom, so this is a must for re-sell!
2. Next, we’ll drywall the ceiling, add insulation, and say a million cuss words. We loath hanging ceiling drywall.
3. We’ll then hang the drywall on the walls.
4. Spackle & Sanding. uhhhhhhhhhh.
5. I ❤ painting. Thinking a greyish blue or green. shocking, right?
6. Trim work is fairly easy, but caulking is not. The only other time I used this stuff, a ton ended up in my hair…?
7. Build window seat and custom desk/bookshelves. This is my hot search topic on Pinterest right now. Look for a new board soon!
8. Lay padding/carpet, which we’ll likely hire some help for.
9. Decorate. Decorate. Decorate 🙂
So as you can see from #7 above, right now I’m thinking this room is going to be an Office/Craftroom/Playroom (yes for our unborn children… sista’s gotta plan, right?). I’m most excited about the window seat and can totally see myself sitting there reading a book or looking for squirrel’s with Bo… we’re easily entertained.
So this weekend we’ve finished #1 and 90% of #2…
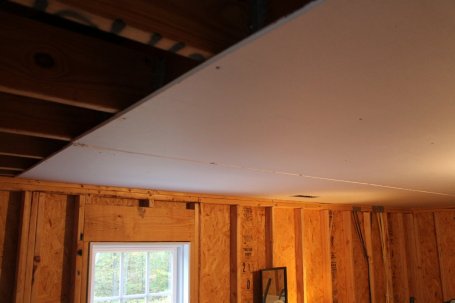
This my friend is a very helpful little tip and essential for hanging ceiling drywall. Build a lift out of 2X4’s and have one person hold the drywall up to the ceiling while the other puts the lift in place. Insert drywall screws and TADA! In the picture below, we’re just testing the lift out before we cut the drywall to align with the ceiling joists.
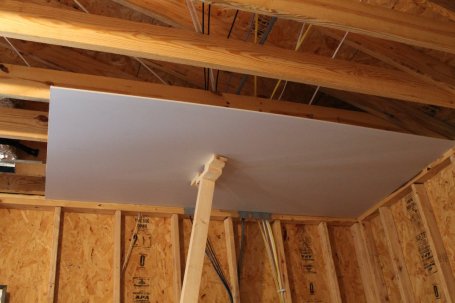
Next weekend we’re hoping to tackle insulation and start the walls. Week 1 down… many to go 🙂
